| Lesson 2 | Use the Backup utility |
| Objective | Define the function of the Backup utility |
Define the function of the Backup utility
Windows 2000 includes an enhanced Backup utility that is designed to help you protect data from accidental loss as a result of hardware or storage media failure.
Using the Backup utility, you can:
This lesson discusses how to backup files and folders. Subsequent lessons will cover the other functionalities of the Backup utility.
The Backup utility supports a variety of storage devices and media, including tape drives, logical drives, removable disks, and recordable CD-ROM drives. In addition, the Backup utility includes wizards that are designed to make using the utility easier and more efficient. Using the Backup utility effectively helps ensure a quick system recovery in the event of a failure.
- Backup files and folders
- Backup system state data
- Schedule a backup
- Restore files and folders
- Restore Active Directory
This lesson discusses how to backup files and folders. Subsequent lessons will cover the other functionalities of the Backup utility.
The Backup utility supports a variety of storage devices and media, including tape drives, logical drives, removable disks, and recordable CD-ROM drives. In addition, the Backup utility includes wizards that are designed to make using the utility easier and more efficient. Using the Backup utility effectively helps ensure a quick system recovery in the event of a failure.
Opening the Backup Utility
Open the Backup utility from the Start menu by navigating to the Accessories menu and then to the System Tools menu. Another, quicker way to open the Backup utility is to type ntbackup at the Run command. The following table describes the functions of the various tabs of the Backup utility
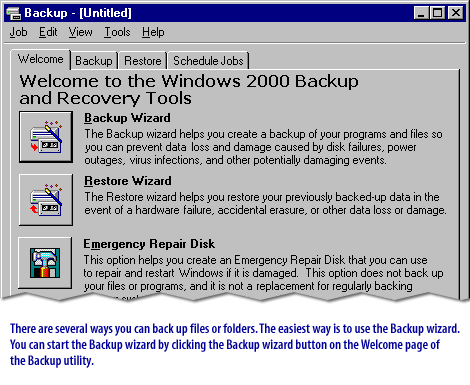
The Welcome tab

| Emergency Repair Disk | Click the Emergency Repair Disk button to create a disk you can use to repair your Windows 2000 installation if it becomes damaged. The Emergency Repair disk will not back up the Active Directory, however. |
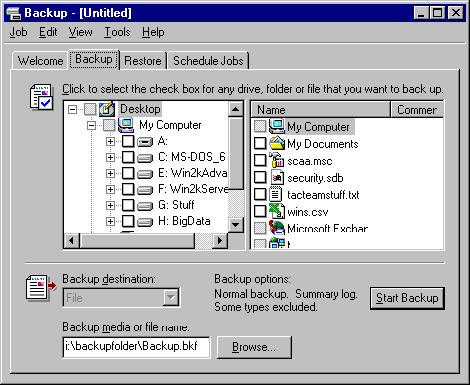
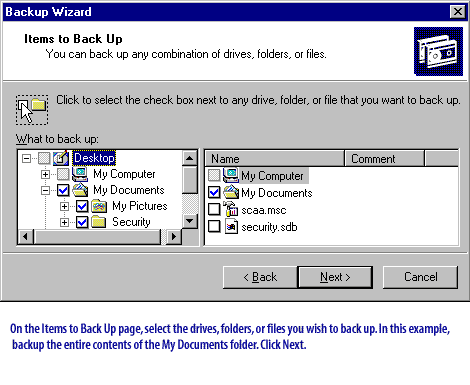
| Drive, folder, or file pane | In the left pane of the Backup tab, you can select drives or folders for back up by placing a checkmark in the appropriate checkbox. If you do not wish toback up an entire drive or folder, you can click a folder or drive and select individual components in the right pane. |
| Backup destination window | In the right pane of the Backup tab, you can select individual components of a drive or folder. |
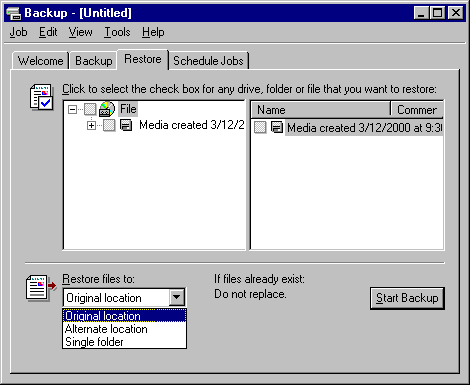
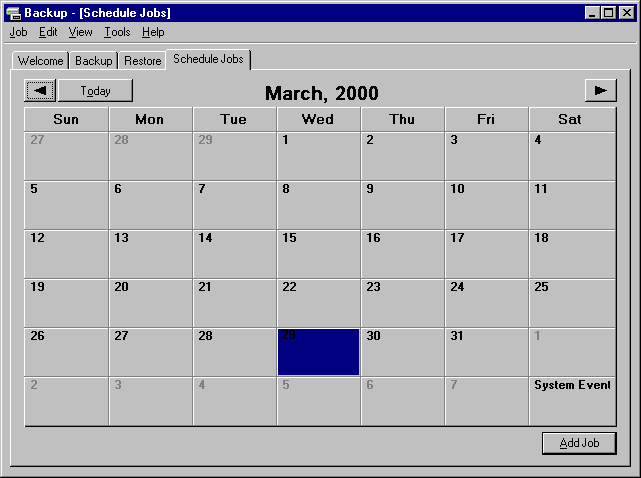
The Restore and Schedule Jobs tabs
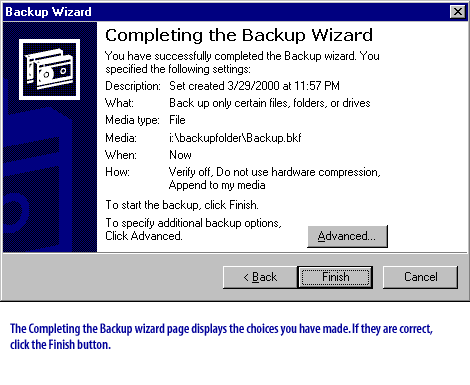
Backing up files and folders
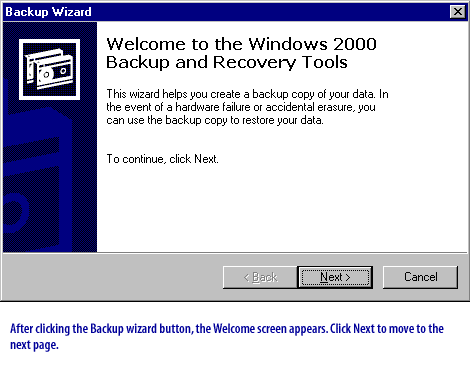
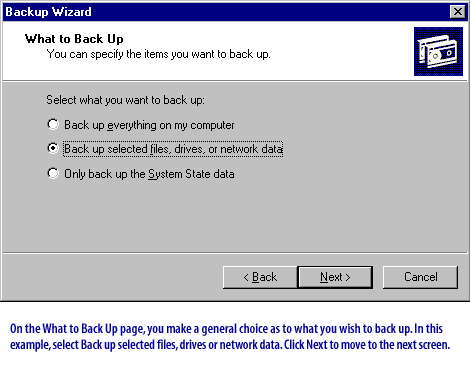
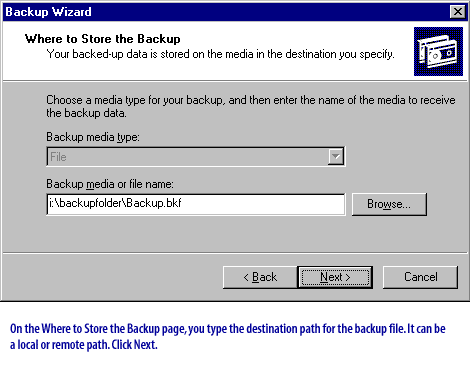
You can use the Backup utility to archive files and folders on volumes that are formatted as either FAT (file allocation table) or NTFS. The Backup utility includes a Backup wizard, which steps you through the entire backup process. You can also use the Backup utility to create a backup job manually, without using the wizard.
AT command
Note: You can still use the AT command to schedule backups if you like. Just use the command line ntbackup and the appropriate parameters and you will be able to schedule backups in the background. This is useful if you wish to call the Backup program from batch files or other scripts. The next lesson describes how to backup system data.