| Lesson 3 | Configuring and starting RIS |
| Objective | Install and configure RIS. |
Configuring and Starting RIS
Installing and configuring RIS involves installing the service through Add/Remove Programs, configuring and starting the service by using the Remote Installation Services Setup wizard, authorizing the RIS server, and granting the users who will be performing remote installations the right to create computer accounts within Active Directory.
The primary steps for setting up a RIS server include:
The primary steps for setting up a RIS server include:
- Configuring and starting RIS
- Authorizing the RIS server and user accounts.
Configuring and Starting RIS
To install RIS, select Add/Remove Windows Components from Add/Remove Programs in Control Panel. Then select the Remote Installation Services checkbox and complete the wizard.
Note: Place the RIS servers in the same site as the client computers that they will serve. This will usually provide better setup performance and limit the amount of RIS-related network traffic that must cross slow network connections. The RIS installation process can easily lead to 100% network utiltization during client installs. After you install RIS, the next step is to run the Remote Installation Services Setup wizard, which will create the initial CD-based image and then configure and start RIS. The following graphic illustrates the information required by, and the tasks accomplished by, the Remote Installation Services Setup wizard.
Note: Place the RIS servers in the same site as the client computers that they will serve. This will usually provide better setup performance and limit the amount of RIS-related network traffic that must cross slow network connections. The RIS installation process can easily lead to 100% network utiltization during client installs. After you install RIS, the next step is to run the Remote Installation Services Setup wizard, which will create the initial CD-based image and then configure and start RIS. The following graphic illustrates the information required by, and the tasks accomplished by, the Remote Installation Services Setup wizard.
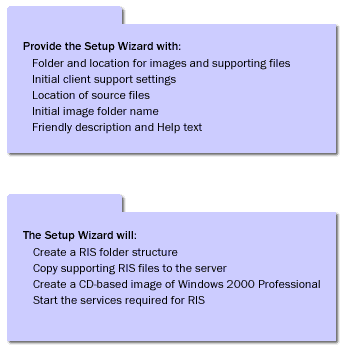
Remote Installation Services Setup wizard
Start the Remote Installation Services Setup wizard by performing the following steps:- Click Start, and then click Run.
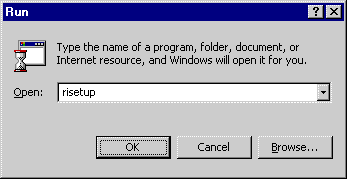
risetup - In the Open box, type risetup and then click OK.
- The Remote Installation Services Setup wizard starts.
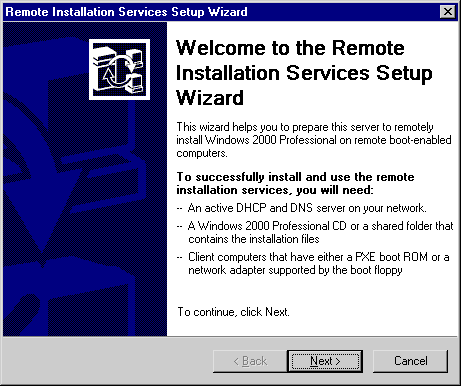
risetup - Follow the on-screen instructions. When prompted, supply the information provided in the following table.
RIS Information Wizard
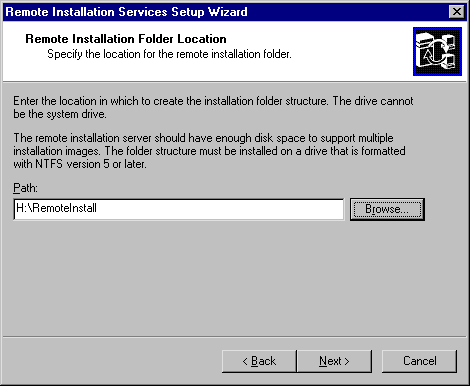
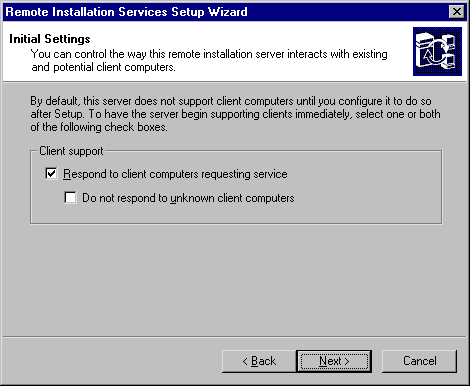
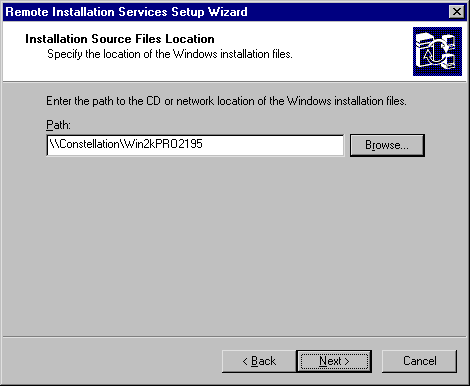
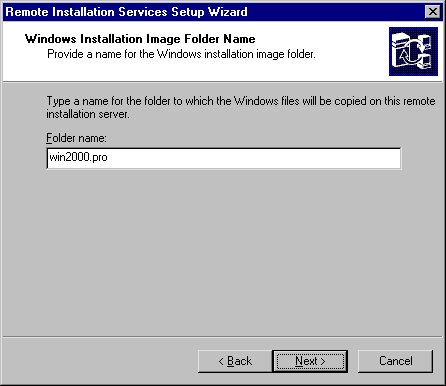
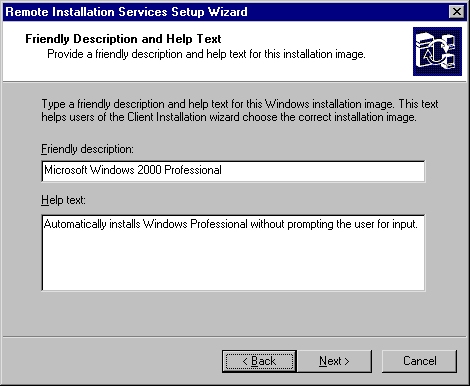
After the Remote Installation Services Setup wizard is finished, Windows 2000 completes the following tasks:
- Creates the RIS folder structure.
- Copies the supporting files to the server.
- Creates the initial CD-based image of Windows 2000 Professional and the default answer file.
- Starts the required services on the RIS server.