| Lesson 8 | Configuring the kernel |
| Objective | Configure Linux Kernel Options before Compilation |
Configure Linux Kernel Options before Compilation
Configuring your kernel correctly is crucial. Not only must you decide what kernel options to include, you must also decide if they are modular or built into the kernel. Linux makes it easy to set kernel options, but you must make sure you choose your options wisely.
Configure Linux Kernel options before compilation
Configuring Linux kernel options before compilation on Red Hat Linux typically involves several steps, primarily focused on using the kernel configuration utilities that come with the Linux source code. Here's a general approach to configuring the kernel options before compiling it:
Note: Always back up important data before installing a new kernel. Configuring and compiling the Linux kernel allows you to optimize the system but can lead to system instability if not done correctly. It's recommended to thoroughly test the new kernel in a non-production environment first.
Configure Linux Kernel options before compilation
Configuring Linux kernel options before compilation on Red Hat Linux typically involves several steps, primarily focused on using the kernel configuration utilities that come with the Linux source code. Here's a general approach to configuring the kernel options before compiling it:
- Install Necessary Development Tools and Dependencies
Before you begin, ensure that you have the necessary tools and dependencies installed. You can install these on Red Hat Linux using the yum or dnf package managers (depending on your version of Red Hat):
sudo yum groupinstall "Development Tools"
sudo yum install ncurses-devel bison flex elfutils-libelf-devel openssl-devel
- Obtain the Kernel Source:
You can download the latest kernel source from the [Kernel.org](https://www.kernel.org/) website or use the source provided by Red Hat through their packages. If you prefer to use the Red Hat distributed kernel with backports and patches, you can install it using:
sudo yum install kernel-devel
Or for a specific version:sudo yum install kernel-devel-$(uname -r)
- Prepare the Kernel Configuration:
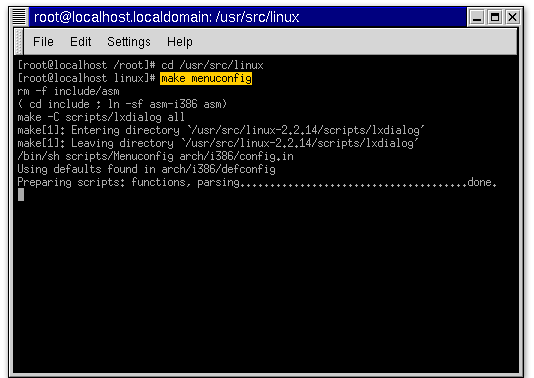
Navigate to the directory where the kernel source is located (e.g.,/usr/src/kernels/$(uname -r)` for Red Hat specific kernels or your custom downloaded path). You configure the kernel using one of the following make menu commands:- make menuconfig: A text-based user interface that runs in the terminal. It's useful for SSH sessions or environments without a graphical interface.
make menuconfig
- make xconfig: A graphical configuration interface that requires Qt libraries.
make xconfig
- make gconfig: Another graphical configuration interface that requires GTK+ libraries.
make gconfig
- make menuconfig: A text-based user interface that runs in the terminal. It's useful for SSH sessions or environments without a graphical interface.
- Configure the Kernel
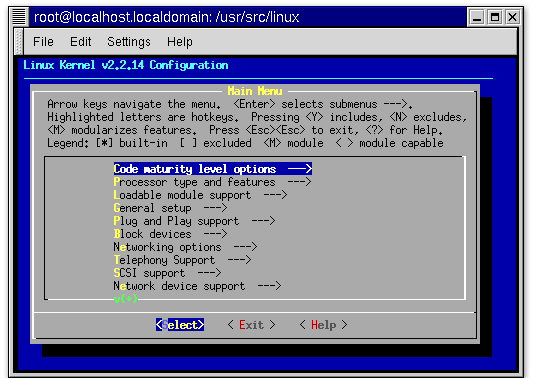
Using make menuconfig or another tool, you can navigate through various kernel configuration options. These options allow you to enable or disable kernel features, set module support, and optimize for specific hardware. The configuration interface categorizes options into different sections, making it easier to manage:
- Navigate through the different menu options to enable or disable specific features.
- Modules can be built-in, modular (loadable as .ko files), or omitted entirely.
- For a typical configuration, you might start with the default configuration file (/boot/config-$(uname -r)) and modify it as needed.
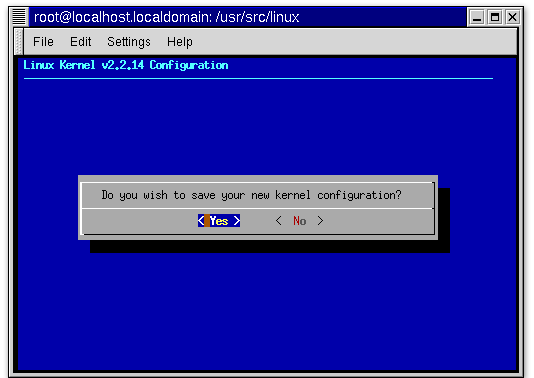
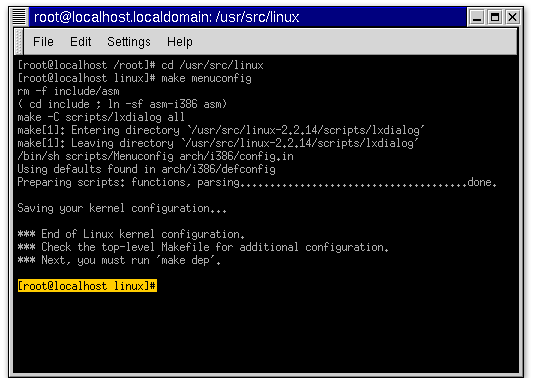
- Save the Configuration: Once you've made the necessary changes, save the configuration. This step is crucial as it updates the .config file with your selections.
- Compile the Kernel: After configuring, compile the kernel and its modules with:
make
make modules
- Install the Kernel: After successful compilation, install the kernel and modules:
sudo make modules_install
sudo make install
This will also update the boot loader entries, typically managed by GRUB. - Reboot and Select the Kernel: Finally, reboot your system. If necessary, select the new kernel from the boot menu to start using it.
Note: Always back up important data before installing a new kernel. Configuring and compiling the Linux kernel allows you to optimize the system but can lead to system instability if not done correctly. It's recommended to thoroughly test the new kernel in a non-production environment first.
Hardware Considerations
When choosing kernel options, consider the specific hardware on your system and your need for protocols and services. Here are some general guidelines to follow.
- Under Code Maturity Level Options, check Prompt for development and/or incomplete code/drivers. If you do not check this option, certain essential services (most notably
rpc.nfsd) may not work correctly. - Optimize for your computer's processor family.
- Turn off math emulation when your system has a dedicated math coprocessor. Intel 386 and 486 systems with a coprocessor, Pentiums, and Alphas all have on-processor math coprocessors.
- Turn off SMP (Symmetric Multi-Processor) support when your system only has a single CPU.
- Modularize as much hardware support as possible.
- Turn off ISDN [1] IrDA[2], and old CD-ROM drivers support, unless you have these capabilities or devices.
- Don't change the default sound configuration.
- Configuring the kernel
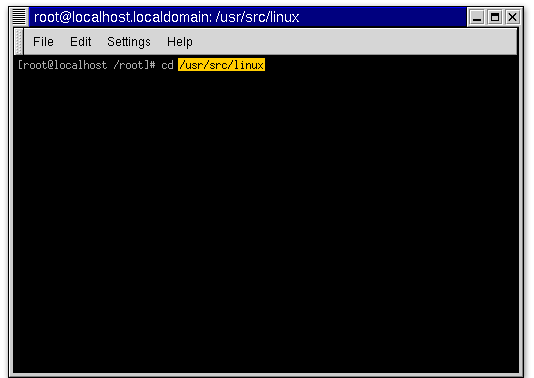
To configure the kernel, follow the following four steps.- Change to the
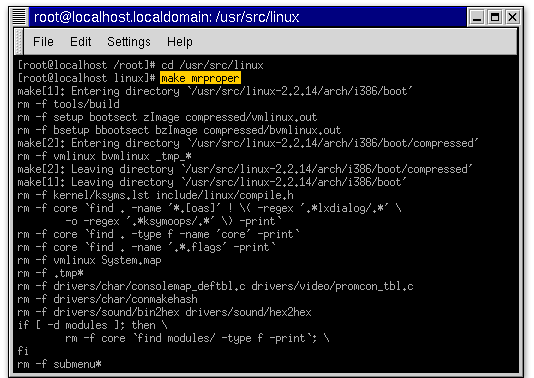
/usr/src/linuxdirectory. - Type
make mrproperto restore the sources to a clean state. - Copy one of Red Hat's default configuration files from the
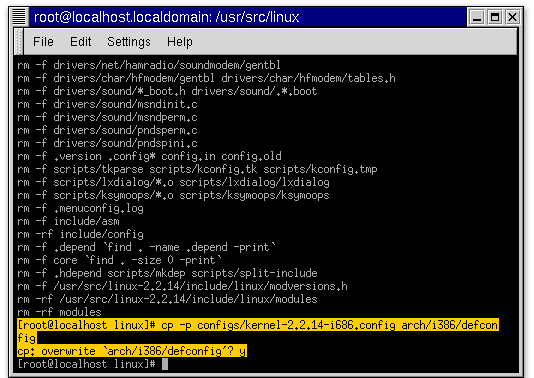
configs/directory toarch/i386/defconfig. Red Hat provides these default configurations for a variety of hardware platforms. The settings inside of each make configuring the kernel easier. - Type
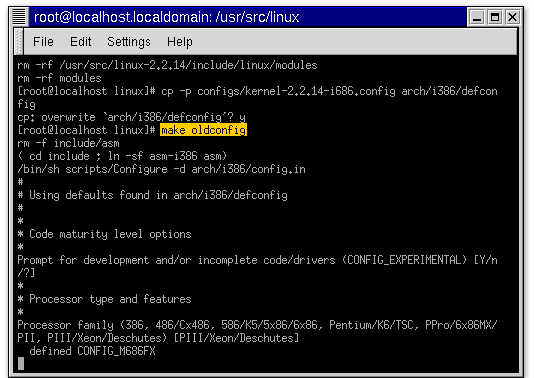
make oldconfigto create a starting Linux kernel configuration file from the default configuration copied in the previous step. - Create the kernel configuration file using one of the standard configuration utilities:
make xconfig, make menuconfig, or make config. - Update the
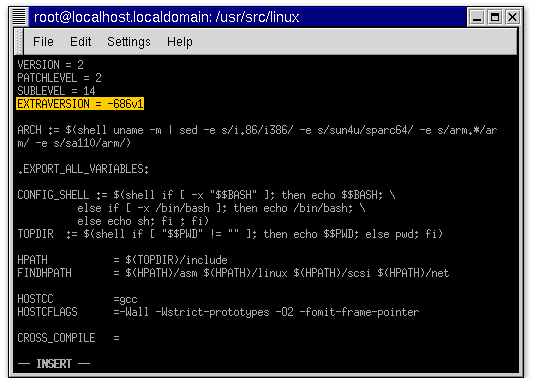
EXTRAVERSION=line in/usr/src/linux/Makefile. - Type
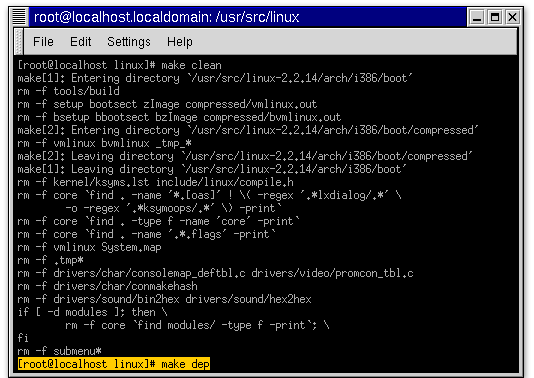
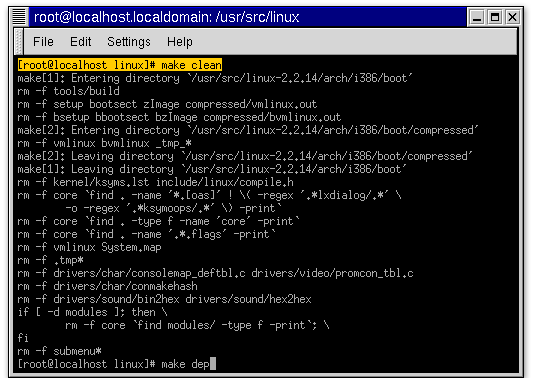
make depto create the source dependencies and propagate configuration information to all makefiles in the development tree. - Type
make cleanto remove old object files.
- Change to the
If you build the kernel in the future and use the same configuration, you do not need to perform steps two, three, and four.
You need to do these steps only the first time you are rebuilding a Red Hat Linux kernel. The next lesson presents the kernel and modules build and install procedures.
You need to do these steps only the first time you are rebuilding a Red Hat Linux kernel. The next lesson presents the kernel and modules build and install procedures.
[1]ISDN: An acronym for Integrated Services Digital Network, ISDN is a standards specification for data transmission over telephone wires and other land-based media.
[2]IrDA: An acronym for Infrared Data Association, IrDA is an international standards body that plans the hardware and software requirements for wireless, infrared data communication.