| Lesson 9 | Installing with the Windows Setup Wizard, part 1 |
| Objective | Use setup GUI to select regional settings, licensing, and domain |
Installing Windows Setup Wizard using GUI to select regional settings
How do you install the "Windows Setup Wizard" using the graphical user interface to select regional settings?
To install Windows using the graphical user interface (GUI) and select regional settings, follow these steps:
Note that the specific steps may vary depending on the version of Windows you are installing.
- Insert the Windows installation media (DVD or USB drive) into your computer and restart the computer.
- When prompted to boot from the installation media, press any key to begin the installation.
- On the first screen of the Windows Setup Wizard, select the language, time, and currency format that you want to use, and click "Next".
- On the next screen, click "Install now" to begin the installation process.
- Read and accept the license terms, and click "Next".
- On the "Which type of installation do you want?" screen, select "Custom: Install Windows only (advanced)".
- On the "Where do you want to install Windows?" screen, select the hard drive or partition where you want to install Windows, and click "Next".
- Windows will begin installing. During the installation process, the "Installing Windows" screen will appear, and Windows will automatically detect your computer's hardware and install the necessary drivers.
- After the drivers are installed, you will be prompted to select your regional settings. Select the appropriate options for your location and click "Next".
- Follow the prompts to complete the installation process, including creating a user account and setting up your network connection.
- Once the installation is complete, Windows will boot up and you can begin using your new operating system.
Note that the specific steps may vary depending on the version of Windows you are installing.
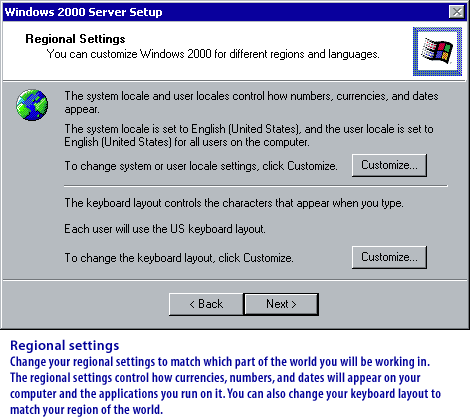
Regional Settings
Use the setup GUI to select regional settings, licensing, and domain information for Windows.
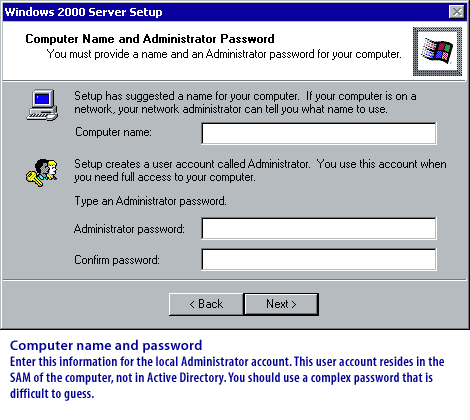
After the text mode of Setup completes, you move into the GUI phase of Setup. Here you will make decisions about which network components to install, the name of the computer, and whether the computer will participate in a workgroup or domain.
After the basic file copy process takes place during the text-based phase, the computer restarts and the GUI mode phase of the installation process begins.
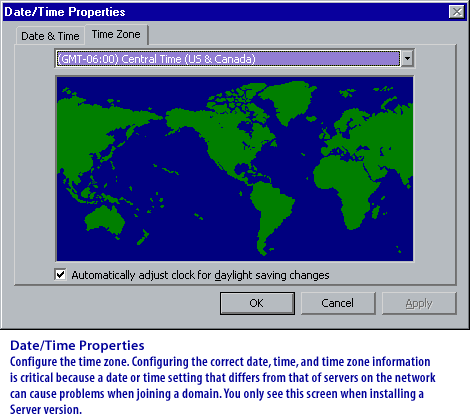
Regional settings
Regional settings allow you to specify how Windows will display dates, times, currency, and numbers, and whether to use U.S. or metric measurements.
You can set the System Locale and Keyboard Layout, which are explained in the following table.
| Setting | Description |
| Current System Locale | Affects the way programs display dates, times, currency, and numbers. You usually choose the locale that matches your location, for example, French (Canada). |
| Current Keyboard Layout | Accommodates the special characters and symbols used in different languages. Your keyboard layout determines which characters appear when you press keys on the keyboard. |
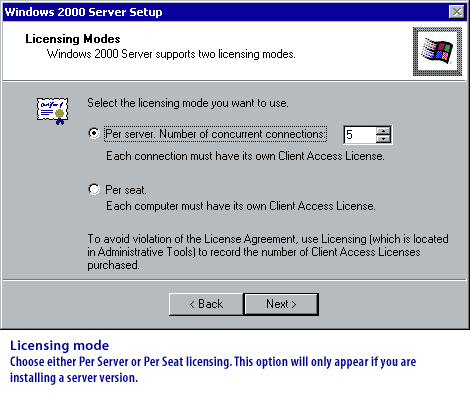
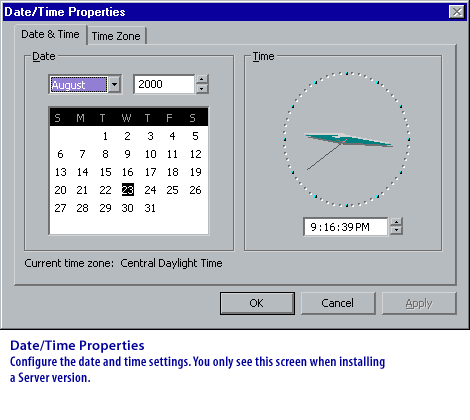
During the GUI phase of installation, the Setup Wizard prompts you to provide information outlined in the following Slideshow:

Server optional components
The following MouseOver describes the Windows optional components you will be prompted for when installing one of the server editions.
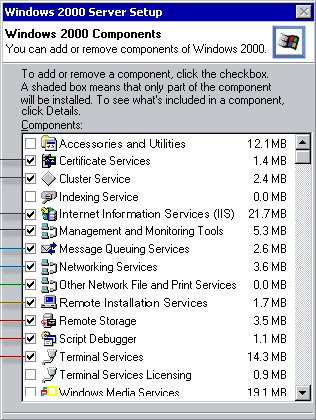
- Certificate Service
- Cluster Services
- Internet Information Services
- Management Tools
- Message Queuing Services
- Networking Services
- Network File Services
- Remote Installation Services
- Remote Storage
- Script Debugge
- Terminal Services
Installing Windows Optional Components
In the next lesson, you will continue using the Windows Setup Wizard.
In the next lesson, you will continue using the Windows Setup Wizard.