| Lesson 7 | Configuring an X startup with .xinitrc |
| Objective | Steps to configure X startup with .xinitrc |
Configuring X Startup with .xinitrc
Lesson objective: In this lesson you learn how to configure your X session startup using the
~/.xinitrc file so that X starts with the window manager and applications you choose.
On many modern Linux systems, X sessions are started by a display manager such as GDM, LightDM,
or SDDM. However, Red Hat–based systems can still use the traditional startx or
xinit workflow. In that case, the file ~/.xinitrc is your per-user startup script:
it tells X which applications and window manager to run as your session begins.
When .xinitrc is used
The ~/.xinitrc file is read when you start X with xinit or its front-end startx.
In this mode:
- You log in on a virtual console (for example, Ctrl+Alt+F3).
- You run
startxfrom the shell prompt. startxlaunches the X server and then executes the commands in~/.xinitrc.
If you always log in through a graphical login manager and never use startx, your system may ignore
.xinitrc and use desktop-environment specific startup mechanisms instead. This lesson focuses on
the startx/xinit path, which is still useful on servers, lab systems, and minimal
installations.
Creating or editing ~/.xinitrc
The .xinitrc file lives in your home directory:
ls -la ~/.xinitrcIf it does not exist, you can create it with your preferred editor:
nano ~/.xinitrc
# or
vi ~/.xinitrc
The file is simply a shell script. Each line is executed in order when your X session starts. You typically:
- Load X resources or settings.
- Set the background and start support tools (clock, load monitor, terminals).
- Start your window manager or desktop environment as the final command.
Basic structure of a .xinitrc file
A minimal .xinitrc might look like this:
xrdb -load "$HOME/.Xresources"
xsetroot -solid gray

# Helper applications
xclock &
xterm  &

# Start the window manager (no ampersand here)
exec fvwm2
A few important rules:
-
Place an ampersand (
&) after each program that should run in the background (xclock,xterm, and similar tools). -
The last line should start your window manager or desktop environment with
execand no ampersand. When that program exits, your X session ends.
Walkthrough: sample .xinitrc (slide show)
The following five images form a slide show that walks through a simple .xinitrc file. Together,
they show how resources are loaded, how geometry is specified, and how the window manager is started.
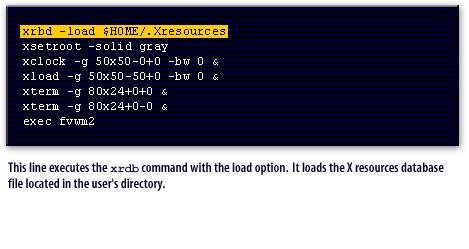
xrdb -load $HOME/.Xresources
xsetroot -solid gray
xclock -g 50x50-0+0 -bw 0 &
xload  -g 50x50-50+0 -bw 0 &
xterm  -g 80x24+0+0 &
xterm  -g 80x24+0-0 &
exec fvwm2
1) The first line runs xrdb with the -load option, loading the X resources
database file located in the user’s home directory. These resources can define fonts, colors, and
other X client settings.
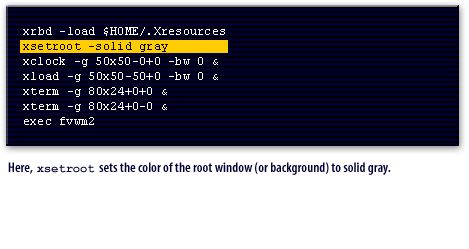
xsetroot -solid gray command sets the color of the root window (the background) to
solid gray. You can change this to another solid color, a bitmap, or an image depending on your preferences.
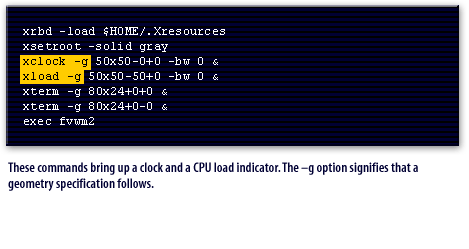
xclock and xload commands bring up a graphical clock and a CPU load
indicator. The -g option introduces a geometry specification that controls size and placement.
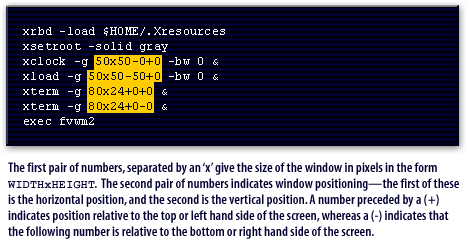
x, specify the window size
(width × height, usually in pixels or characters, depending on the program). The second pair of numbers sets
the window position. A leading + positions relative to the top or left edge of the screen, while
a leading - positions relative to the bottom or right edge.
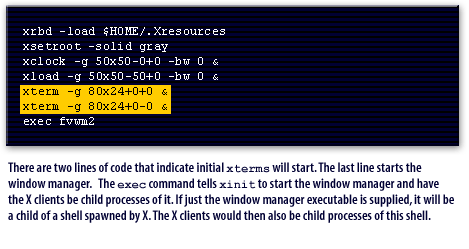
xterm -g 80x24+0+0 &
xterm -g 80x24+0-0 &
5) These two lines start initial xterm windows with different geometry settings. The last line
of the file (not shown here) starts the window manager with exec fvwm2. Using exec
makes the window manager the main client of the X session; all other X clients are child processes of it.
Starting desktop environments from .xinitrc
Instead of a traditional window manager, you may want to start a full desktop environment (such as GNOME or KDE)
from .xinitrc. In that case, the final line of the file typically looks like one of the following:
-
GNOME:
exec /usr/bin/gnome-session -
KDE Plasma:
exec startkde -
LXDE:
exec /usr/bin/startlxde -
XFCE:
exec startxfce4
The exact paths can vary by distribution and version, but the pattern is always the same: start helper applications in the background, then exec the desktop environment as the last line.
Additional customization in .xinitrc
Because .xinitrc is just a shell script, you can set environment variables and launch additional
applications before the final exec line. Examples:
Setting environment variables:
# Set environment variable for DISPLAY (usually not needed to override)
export DISPLAY=:0.0

# Example custom font path
export FONT="/path/to/your/font.ttf"
Launching additional applications:
# Start a terminal emulator in the background
xterm &

# Launch a file manager in the background
thunar &
Making .xinitrc executable and starting X
When you are satisfied with your configuration, make the .xinitrc file executable:
chmod +x ~/.xinitrcThen start your X session from the console:
startx
The X server will start, run the commands in ~/.xinitrc in order, and then hand control to your
window manager or desktop environment. When that final program exits, the X session ends and you return to the
virtual console.
Summary
The ~/.xinitrc file gives you precise control over what happens when your X session starts:
you can load resources, configure the background, start diagnostic tools and terminals, and finally launch
the window manager or desktop environment of your choice. The five-step slide show in this lesson walks you
through a concrete example, so you can adapt the same structure to your own Red Hat Linux environment.
In the next lesson, you will see how this X startup configuration fits into the broader module on configuring the X display server.