| Lesson 3 | Configure Remote Desktop Services |
| Objective | Configure user access and client settings. |
Configuring Remote Desktop Services
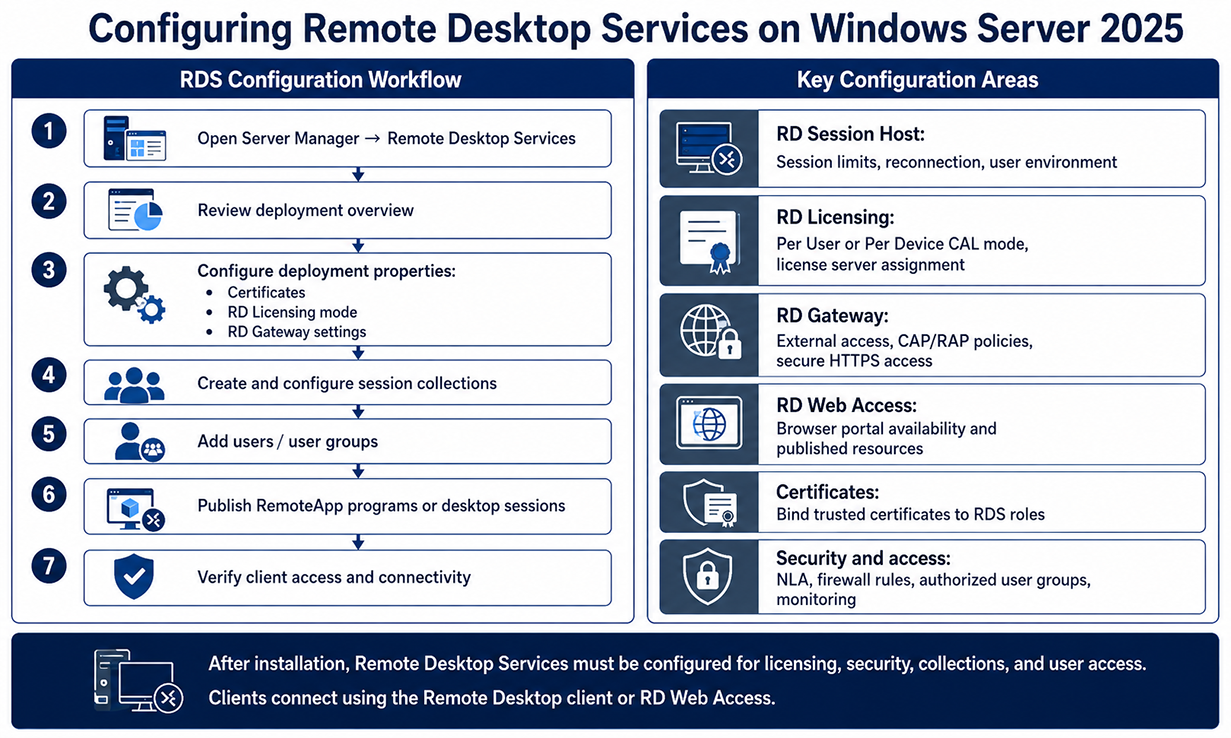
Configuring Remote Desktop Services on Windows Server 2025 involves two primary areas: user access configuration and client settings configuration. User access configuration controls who can connect to the RDS infrastructure and which resources they can reach. Client settings configuration controls the behavior of client connections, including device redirection, Group Policy enforcement, and RDP file distribution.
User Access Configuration
Step 1: Add Users to the Remote Desktop Users Group
The Remote Desktop Users group on the RD Session Host server controls which accounts are permitted to establish remote desktop sessions. Members of this group are granted the "Allow log on through Remote Desktop Services" user right.
Add users through System Properties:
- Right-click This PC and select Properties
- Click Remote Settings in the left panel
- Under Remote Desktop, click Select Users
- Click Add, enter usernames or group names such as Domain Users, then click OK
Step 2: Configure RDS User Access in Active Directory
For domain environments, user access is managed through Active Directory group membership rather than local group membership on each session host individually. In Active Directory Users and Computers:
- Open the user's properties
- On the Member Of tab, verify the account is a member of the Remote Desktop Users group or a custom security group created for RDS access
- For bulk assignment, add the security group to the Remote Desktop Users local group on each RD Session Host through Group Policy Restricted Groups
Step 3: Configure RD Session Host Permissions
The Local Security Policy on each RD Session Host controls the "Allow log on through Remote Desktop Services" user right at the OS level:
- Open Local Security Policy (
secpol.msc) on the RD Session Host - Navigate to Local Policies, User Rights Assignment
- Open "Allow log on through Remote Desktop Services"
- Add the appropriate user groups
In domain environments this is typically managed through Group Policy applied to the RD Session Host organizational unit, rather than configured locally on each server.
Step 4: Assign Permissions to Session Collections
Session collections in Server Manager define which users can access specific published applications or full desktop sessions:
- Open Server Manager and navigate to Remote Desktop Services
- Select the session collection
- Click Tasks, then Edit Properties
- On the User Groups tab, add or remove the security groups that should have access to this collection
Step 5: Enable Multi-Factor Authentication (Recommended)
For production deployments, integrate RD Gateway with Azure AD or a third-party MFA solution. Multi-factor authentication adds a second authentication factor before users reach the RDS infrastructure, reducing the risk of credential-based attacks against the Remote Desktop Protocol endpoint.
Client Settings Configuration
Step 1: Customize RDP Connection Properties via Group Policy
Group Policy is the primary mechanism for enforcing consistent client settings across all RDS connections in a domain environment:
- Open Group Policy Management Console (
gpmc.msc) for domain policies, or Local Group Policy Editor (gpedit.msc) for local policies - Navigate to Computer Configuration, Administrative Templates, Windows Components, Remote Desktop Services, Remote Desktop Session Host
- Key settings under Device and Resource Redirection:
- Clipboard redirection: allow or deny clipboard sharing between client and session
- Printer redirection: allow or deny client printer mapping in sessions
- Drive redirection: allow or deny mapping of client local drives into sessions
- USB redirection: allow or deny USB device redirection
Step 2: Configure Licensing Mode
RD Licensing mode must be set before the 120-day grace period expires on a new RDS deployment:
- Open Server Manager and navigate to Remote Desktop Services, Overview
- Under Deployment Overview, click the RD Licensing role service
- Select Per User or Per Device licensing mode based on your Microsoft licensing agreement
- Assign the license server in RD Licensing Manager
Per Device assigns a CAL to each device that connects. Per User assigns a CAL to each user account. Mixed environments typically use Per User for flexibility.
Step 3: Customize and Distribute RDP Files
RDP files allow users to launch Remote Desktop connections with pre-configured settings without manual configuration:
- Open Remote Desktop Connection (
mstsc.exe) on a client machine - Configure the connection settings, including server address, display resolution, and resource redirection preferences
- Click Show Options to expand all settings
- On the Experience tab, select the connection speed profile that matches the user's network type
- Save the configuration as an .rdp file
- Distribute the .rdp file to users through a shared folder, email, or the RD Web Access portal
Signing .rdp files with a trusted certificate prevents the "publisher unknown" warning that appears when users open unsigned .rdp files.
Step 4: Configure Session Environment via Group Policy
The Remote Session Environment policy area controls display and multimedia behavior for RDS sessions:
- Navigate to Computer Configuration, Administrative Templates, Windows Components, Remote Desktop Services, Remote Desktop Session Host, Remote Session Environment
- Key settings:
- Font smoothing: enables ClearType text rendering in sessions
- Desktop composition: enables Windows Aero effects if the session host hardware supports it
- Audio and video playback redirection: streams audio and video from the session host to the client rather than rendering on the server
- RemoteFX settings: configures hardware-accelerated graphics for sessions that require richer visual performance
Step 5: Configure RD Gateway for External Access
For users connecting from outside the corporate network:
- Open RD Gateway Manager on the gateway server
- Create an RD Connection Authorization Policy (CAP) specifying which user groups are permitted to connect through the gateway
- Create an RD Resource Authorization Policy (RAP) specifying which internal servers those users can reach after connecting through the gateway
- Assign an SSL/TLS certificate to the RD Gateway listener to enable HTTPS connections on port 443
Best Practices
- Use Group Policy to enforce consistent configurations across all RD Session Hosts and clients. Local policy changes on individual servers are overridden by domain Group Policy and create configuration drift over time.
- Enable SSL/TLS encryption and Network Level Authentication (NLA) for all client connections. NLA authenticates the user before establishing the full RDS session, reducing resource consumption from unauthenticated connection attempts.
- Follow the principle of least privilege when assigning RDS access. Grant access to specific session collections rather than the entire RDS infrastructure wherever possible.
- Test client configurations in a staging environment before deploying Group Policy changes to production users. RDS Group Policy changes take effect at the next session logon and may disconnect or reconfigure active sessions.
Configuring Remote Desktop Services - Exercise
Practice configuring user access and client settings for Remote Desktop Services with the following exercise:
Configuring Remote Desktop Services - ExerciseThe next lesson covers installing the Remote Desktop Services client on Windows, macOS, iOS, and Android endpoint devices.