| Lesson 9 | Changing maps on the server |
| Objective | Add a new user to an NIS database. |
Changing Maps on Server
Sometimes the system administrator needs to make changes directly on the NIS server. For example, if the administrator wants to
create a new user account, he or she must add appropriate records to the NIS maps. The simulation below demonstrates this procedure on a Linux machine. The processes and commands are essentially the same on other flavors of UNIX.
1) Change Map 1
2) Change Map 2
3) Change Map 3
4) Change Map 4
5) Change Map 5
6) Change Map 6
7) Change Map 7
8) Change Map 8
9) Change Map 9
10) Change Map 10
11) Change Map 11
12) Change Map 12
13) Change Map 13
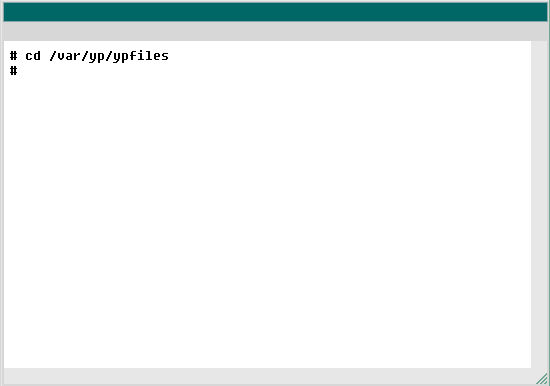
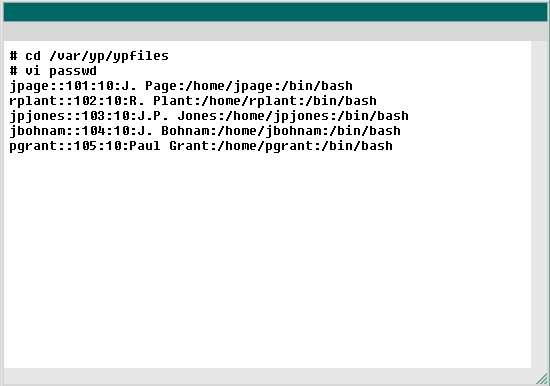
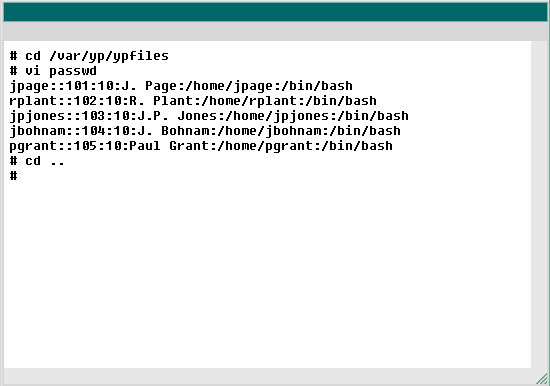
- You are logged on to the NIS server as root and are in the /home/user1 directory. Using the vi program, you are going to add a new user to the NIS database. This involves editing the passwd file, then creating a new NIS map. Change to the /var/yp/ypfiles directory, which is the directory that contains passwd.
- Change directories
- cd /var/yp/ypfiles
- Type cd /var/yp/ypfiles
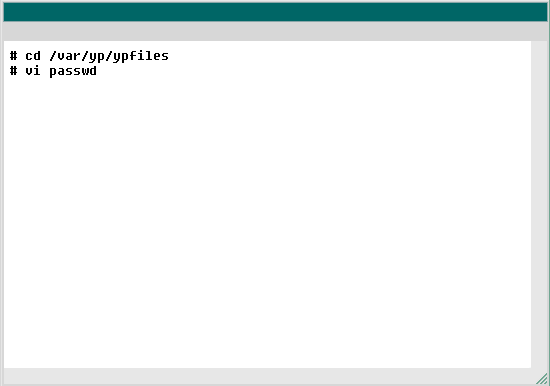
- Use vi to open the passwd file.
- Open a file in vi,
- vi passwd
- Type vi passwd
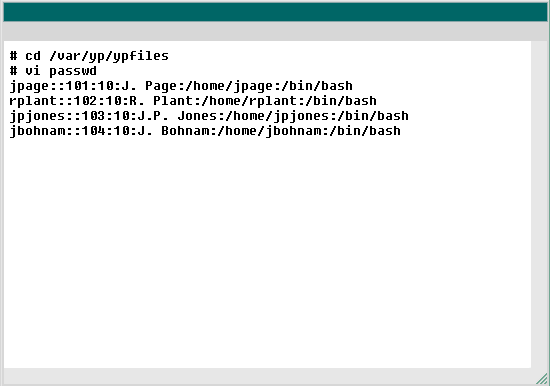
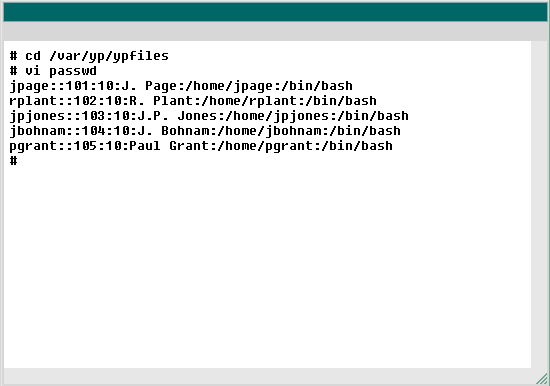
- You can enter a new user, just as you would in the /etc/passwd file. Type the following user information after the last line in this file: pgrant::105:10:Paul Grant:/home/pgrant:/bin/bash Normally, you would press the Esc key plus ZZ to save your changes and exit vi. For the purpose of this simulation, press the Enter key on your keyboard to continue.
- Enter user information
- pgrant::105:10:Paul Grant:/home/pgrant:/bin/bash
- Type pgrant::105:10:Paul Grant:/home/pgrant:/bin/bash
Adding a new user to an NIS database
Here are the steps you followed to add a new user to an NIS database and change the NIS map:- You are logged on to the NIS server as root and are in the /home/user1 directory. Using the vi program, you are going to add a new user to the NIS database. This involves editing the passwd file, then creating a new NIS map. Change to the /var/yp/ypfiles directory, which is the directory that contains passwd.
- Use vi to open the passwd file.
- You can enter a new user, just as you would in the /etc/passwd file. Type the following user information after the last line in this file:
pgrant::105:10:Paul Grant:/home/pgrant:/bin/bash
.
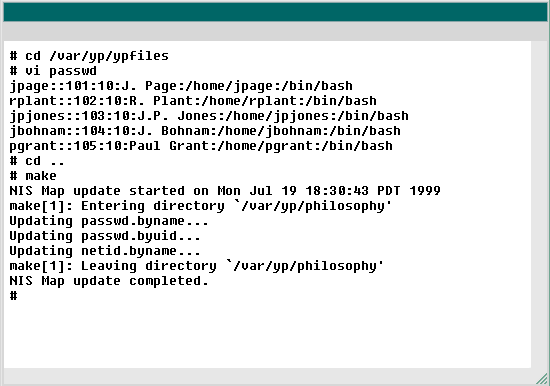
Normally, you would press the Esc key plus ZZ to save your changes and exit vi. For the purpose of this simulation, press the Enter key on your keyboard to continue. - The next step is to make your NIS server aware of this new user. You do this by running the
makeprogram. First, you must run this from the /var/yp directory. You are now in the/var/yp/ypfiles directory.
Typecd ..to change to the /var/yp directory. - Run the
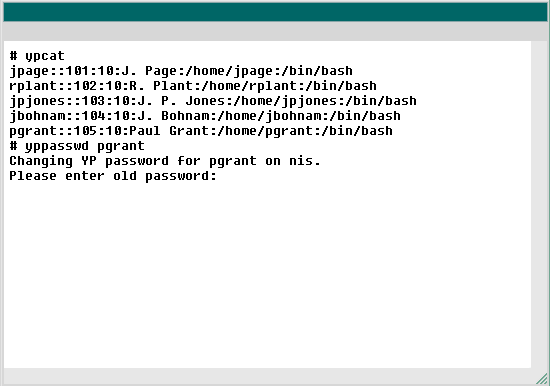
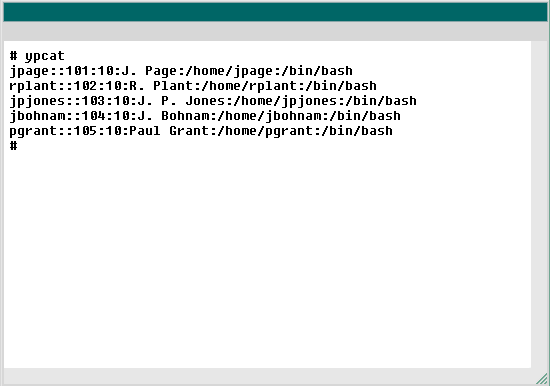
makeprogram to recompile the NIS map. - You now have a new NIS map. Verify that you have created a new map by typing
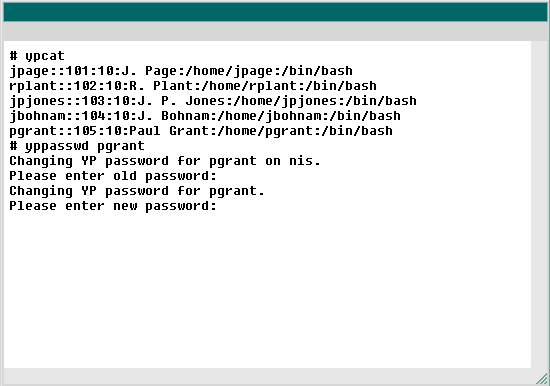
ypcat. - You can now see the new username. Notice that NIS placed this username in alphabetical order. This is because the
ypcatprogram is not reading the /var/yp/ypfiles/passwd file. It is reading the NIS map itself. Now, add a password by typingyppasswd pgrant. - The user pgrant has no password. Press the Enter key on your keyboard.
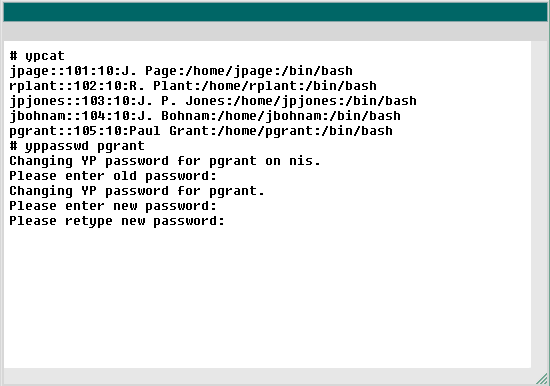
- Give pgrant a new password:
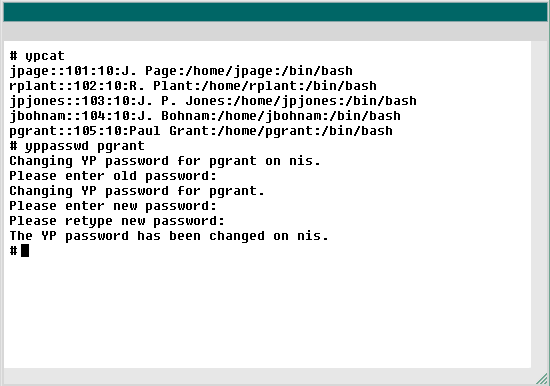
manager1. - The new password you have assigned is 8 characters, the minimum in NIS. If you type a password that is too short,
yppasswdwill reject it. Now, confirm the new password by retyping it. - You now have created a new user and assigned her a password. The user is free to change this password, as soon as she logs on.